
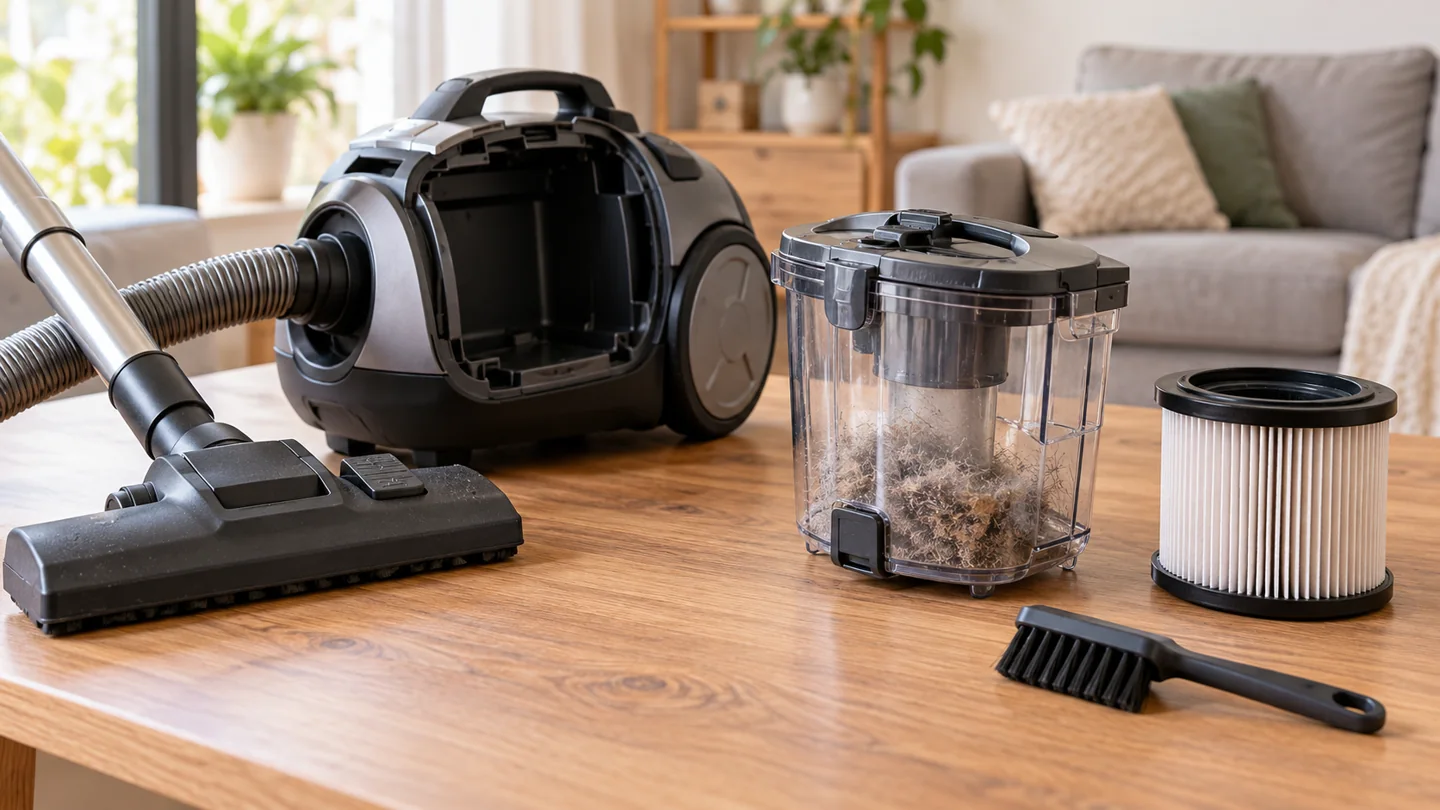
Clean a vacuum by isolating power, emptying or replacing its collection container, removing accessible tangles and blockages, and caring for each filter according to the exact model instructions. Wash only components identified as washable, keep electrical parts dry, and reassemble the machine with every required part fully dry and correctly seated.

There is no safe universal instruction to put all attachments, filters, hoses, or floorheads in water. A single vacuum can contain washable foam, a nonwashable exhaust filter, a powered head, and a bin with different cleaning rules. Use the owner’s manual to identify the parts before choosing a cleaning method.
Before you start: identify the vacuum and its parts
Find the full model number on the rating label, then locate the matching manufacturer manual. Note whether the machine is bagged or bagless, corded or battery-powered, and whether the head or hose contains electrical components. A family name alone may not distinguish revisions and accessory bundles.
Gather a waste bag, a soft dry brush, clean cloths, and any tool the manufacturer supplies for hair removal. Set aside a work area where debris can be contained and components can dry undisturbed. Photograph unfamiliar assemblies before removing permitted parts.
| Part | Normal starting approach | Important limit |
|---|---|---|
| Disposable dust bag | Replace using the specified bag type | Do not wash or empty a single-use bag for reuse |
| Removable bin | Empty at the marked limit; clean as directed | Not every bin or separator assembly is washable |
| Filters | Identify each element and its care method | Washability differs by component and model |
| Brushroll and floorhead | Remove accessible hair and debris with power isolated | Keep powered parts and bearings dry unless specifically permitted |
| Hose and wand | Inspect permitted detachable sections for obstructions | Some hoses contain electrical conductors |
| Body, cord, and charger | Inspect and wipe only as directed | Do not immerse, spray internally, or open electrical housings |
Step 1: switch off and isolate power
Unplug a corded machine from the outlet, holding the plug rather than pulling the cable. For a cordless model, follow the manual’s maintenance procedure, including removal of a user-removable battery where specified. Disconnect powered tools and wait for moving parts to stop.
If the vacuum recently overheated, follow its documented cooling instructions. If there was smoke, sparking, damaged wiring, a swollen battery, or an unexplained burning odor, stop ordinary cleaning and arrange assessment. Maintenance is not a substitute for resolving a safety fault.
Step 2: empty the bin or replace the bag
Take the collection system to an appropriate waste container and minimize dust release. Lower a bagless bin close to the receiving bag before opening its release. Avoid shaking debris through the room. Follow any sealing procedure provided for a disposable bag.
Inspect the bin seal, lid, latch, and accessible screen. Remove lodged ordinary debris using the approved method. If the manual permits washing a removable bin, separate it from electronic or nonwashable parts first and follow the specified drying process.
Fit the correct replacement bag securely. Do not force the lid closed over a misaligned bag or substitute an improvised collection container. The inlet connection and seal help keep debris on its intended route.
Step 3: care for each filter individually
Locate every filter shown in the manual, which may include a pre-motor filter and a separate exhaust element. Label their positions in your notes if they look similar. Do not assume the word HEPA determines whether a filter can be washed.
For a washable filter, follow the manufacturer’s water-temperature, detergent, handling, and drying instructions. For a nonwashable filter, use the approved dry-care method or replace it as directed. Do not scrub, blow out, or chemically treat media unless specifically allowed.
For example, Dyson’s cordless filter-care guidance requires thorough drying and gives a minimum drying period for the covered filters. That does not make the same method suitable for every brand or component. A filter that still feels damp must not be refitted merely because the minimum time has passed.
See when to clean or replace vacuum filters for signs of damage, loading, and replacement needs.
Step 4: clear hair from the brushroll
Place the isolated vacuum or detached head securely so it cannot fall or roll. Open only the user-accessible cover identified in the manual. Remove wrapped hair and thread carefully, keeping cutting tools away from bristles, seals, wiring, and your hands.
Pay attention to the roller ends and accessible bearing areas. Do not pull hair so forcefully that it damages the brush assembly. Some rollers detach; others require a different procedure. Do not soak a powered head or its motor.
Inspect the roller cover and cleaning strips before reassembly. A missing or poorly fitted cover can affect pickup and expose parts that should not contact the floor. Check the wheels for embedded grit before moving to a sensitive hard surface.
Step 5: inspect the hose, wand, and accessible ducts
Detach only the sections intended for user maintenance. Check both ends, bends, and connection points for ordinary debris. Use a flashlight rather than reaching blindly into a blockage that could contain sharp material.
Do not pierce a hose with a screwdriver, force a rigid object around a bend, or blow a cloud of dust through the machine with compressed air. Some manufacturers permit a particular blunt method for specific components; follow that documented procedure rather than generalizing it.
Our vacuum-hose unclogging guide covers the diagnostic sequence. If a hose is split or its electrical connectors are damaged, cleaning will not repair it.
Step 6: wipe the exterior and inspect electrical equipment
Use the exterior-cleaning method in the manual, keeping moisture away from switches, vents, charging contacts, and electrical connections. Do not spray liquid directly into the machine or wash the body under a tap.
Look for cord damage, crushed insulation, loose connections, a cracked plug, or a damaged charger. The CPSC guide to home wiring hazards explains why damaged cables and plugs need proper attention. Stop using affected equipment rather than covering damage with tape.
For charging contacts, follow the model’s instructions; do not introduce abrasive material or a wet cleaning mixture. A robot’s sensors, wheels, and dock also need model-specific care. See robotic-vacuum maintenance for that separate routine.
Step 7: dry, reassemble, and check
Keep washed components in the recommended drying conditions. Do not use an oven, microwave, tumble dryer, hair dryer, or radiator unless the manufacturer explicitly prescribes a method—which ordinary vacuum care instructions generally do not. Heat can distort parts or damage filter media.
Refit filters in the correct orientation, engage catches, secure covers, and check that the bin or bag is seated. Use the documented normal test only when there is no unresolved fault. Stop if the machine produces an unusual smell, noise, warning, or dust leak.
How often should you clean the vacuum?
Use the manual’s schedule as the baseline and inspect the machine more often when collecting lots of hair or fine ordinary dust. Empty the collection system at its indicated limit, remove tangles before they become severe, and attend to performance changes promptly.
A simple log can record filter cleaning, replacement dates, and recurring problems. Separate “inspect,” “wash,” and “replace” in that log: these are different tasks. Do not replace every component monthly or wash everything after each session without a reason.
The cleaning schedule also depends on how often the vacuum is used. Our guide to vacuuming frequency helps plan the household routine without prescribing the same schedule for every room.
Frequently asked questions
Can I use dish soap on all vacuum parts?
No. Use detergent only where the manual permits it for the specific removable component. Some filters require water only; some parts must not be washed at all.
Can I run the vacuum while a filter dries?
Not without the required filter. Use a correctly fitted, fully dry compatible spare if the manufacturer allows that arrangement. Do not bypass filtration.
Should I add baking soda to remove smells?
Do not add powder or fragrance to the appliance unless its instructions allow it. Identify moisture or contamination and clean permitted parts correctly. Fine powders can load filters and are not a repair for a persistent odor.
Clean by component, not by guesswork
The reliable routine is to identify the parts, isolate power, remove ordinary debris, use only approved cleaning methods, and reassemble everything dry and secure. That protects the machine’s intended airflow and filtration while avoiding the damage caused by indiscriminate washing.

Katy James contributes vacuum-cleaner explainers and practical cleaning guidance at GlobVacs. Her published topics include robot-vacuum operation and vacuum airflow. Read her author profile and selected articles.